PostgreSQL
Introduction
Postgres is one of the most commonly used databases in the world and Neosync natively supports most postgres-compatible databases.
The following guide will show you how to configure and test your Postgres Connection.
Configuring Postgres
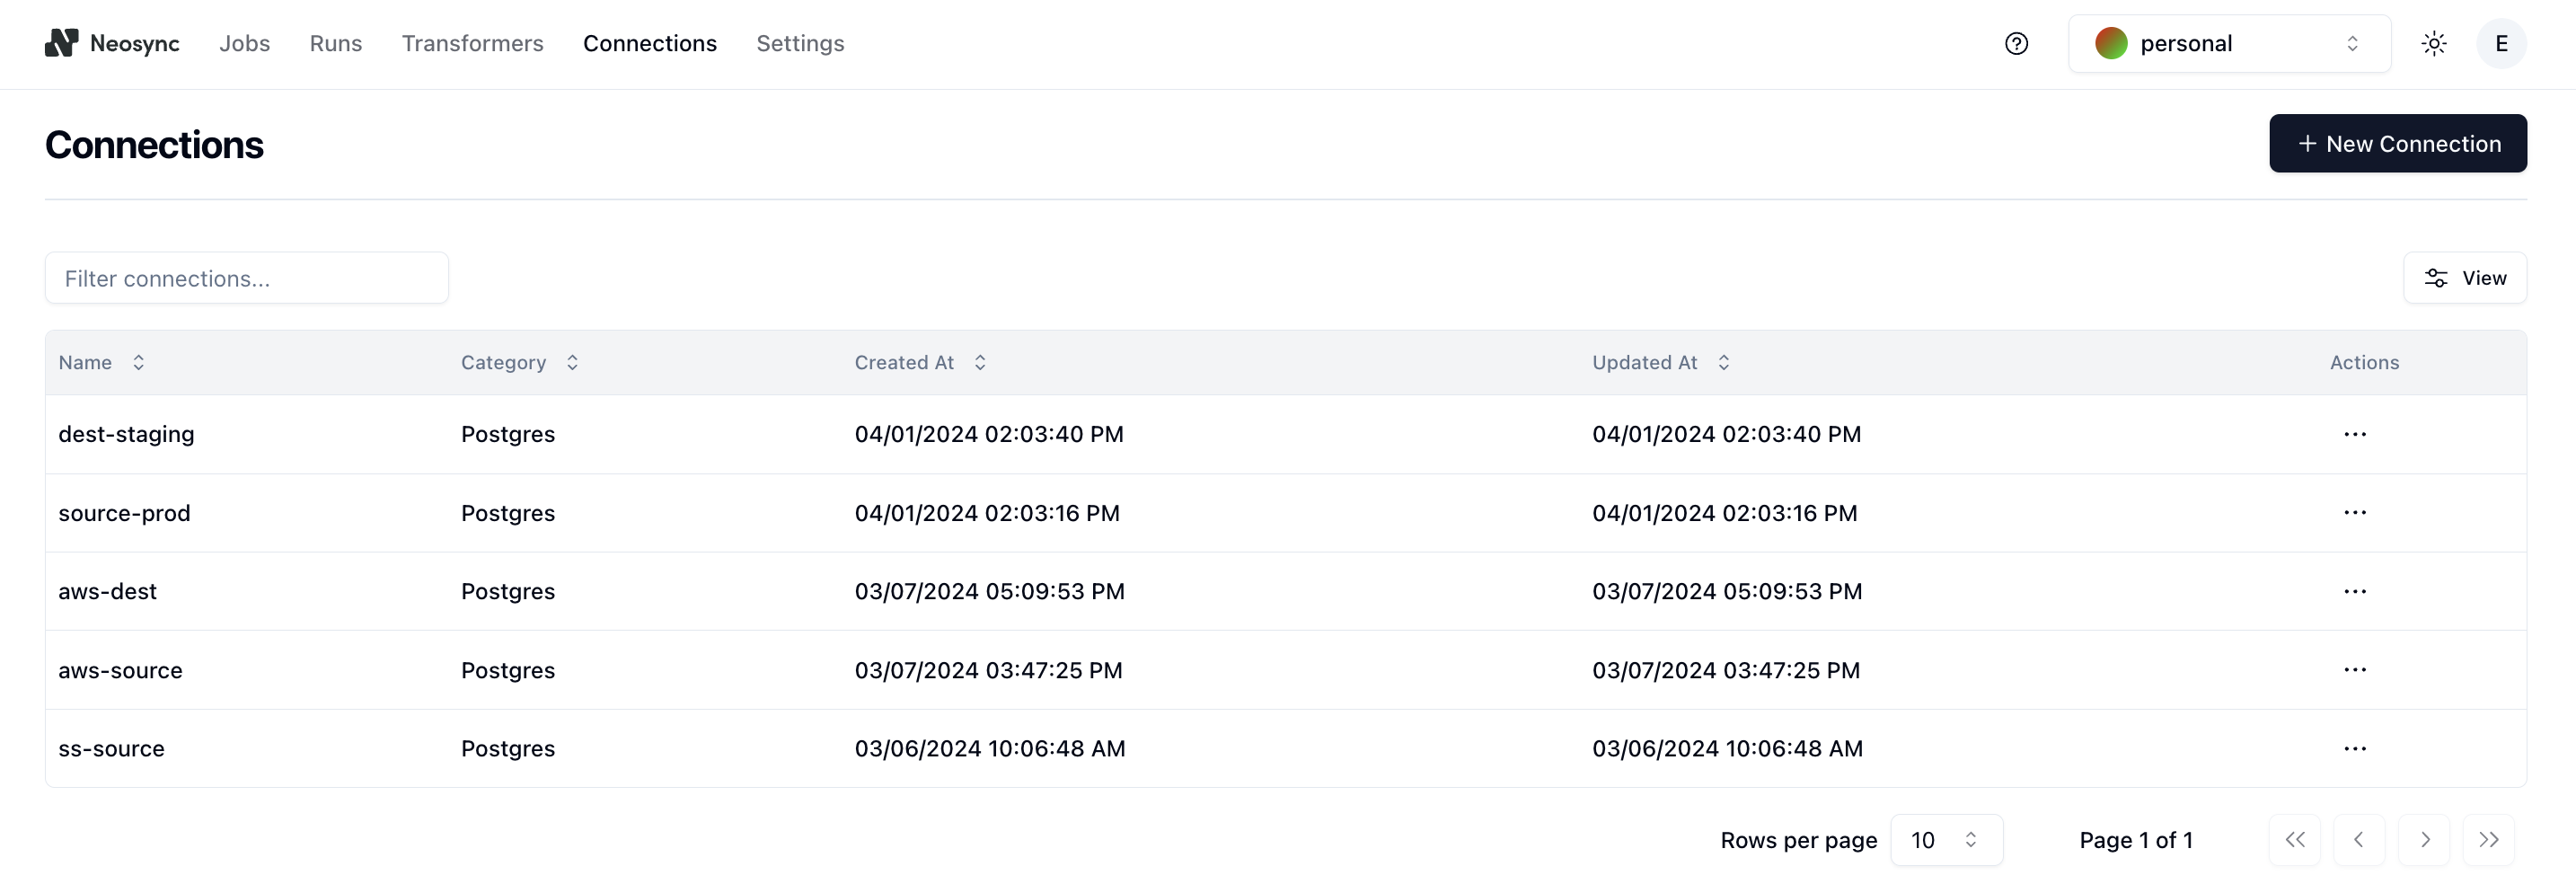
In order to connect to your Postgres database, first navigate to Connections and then click + New Connection.
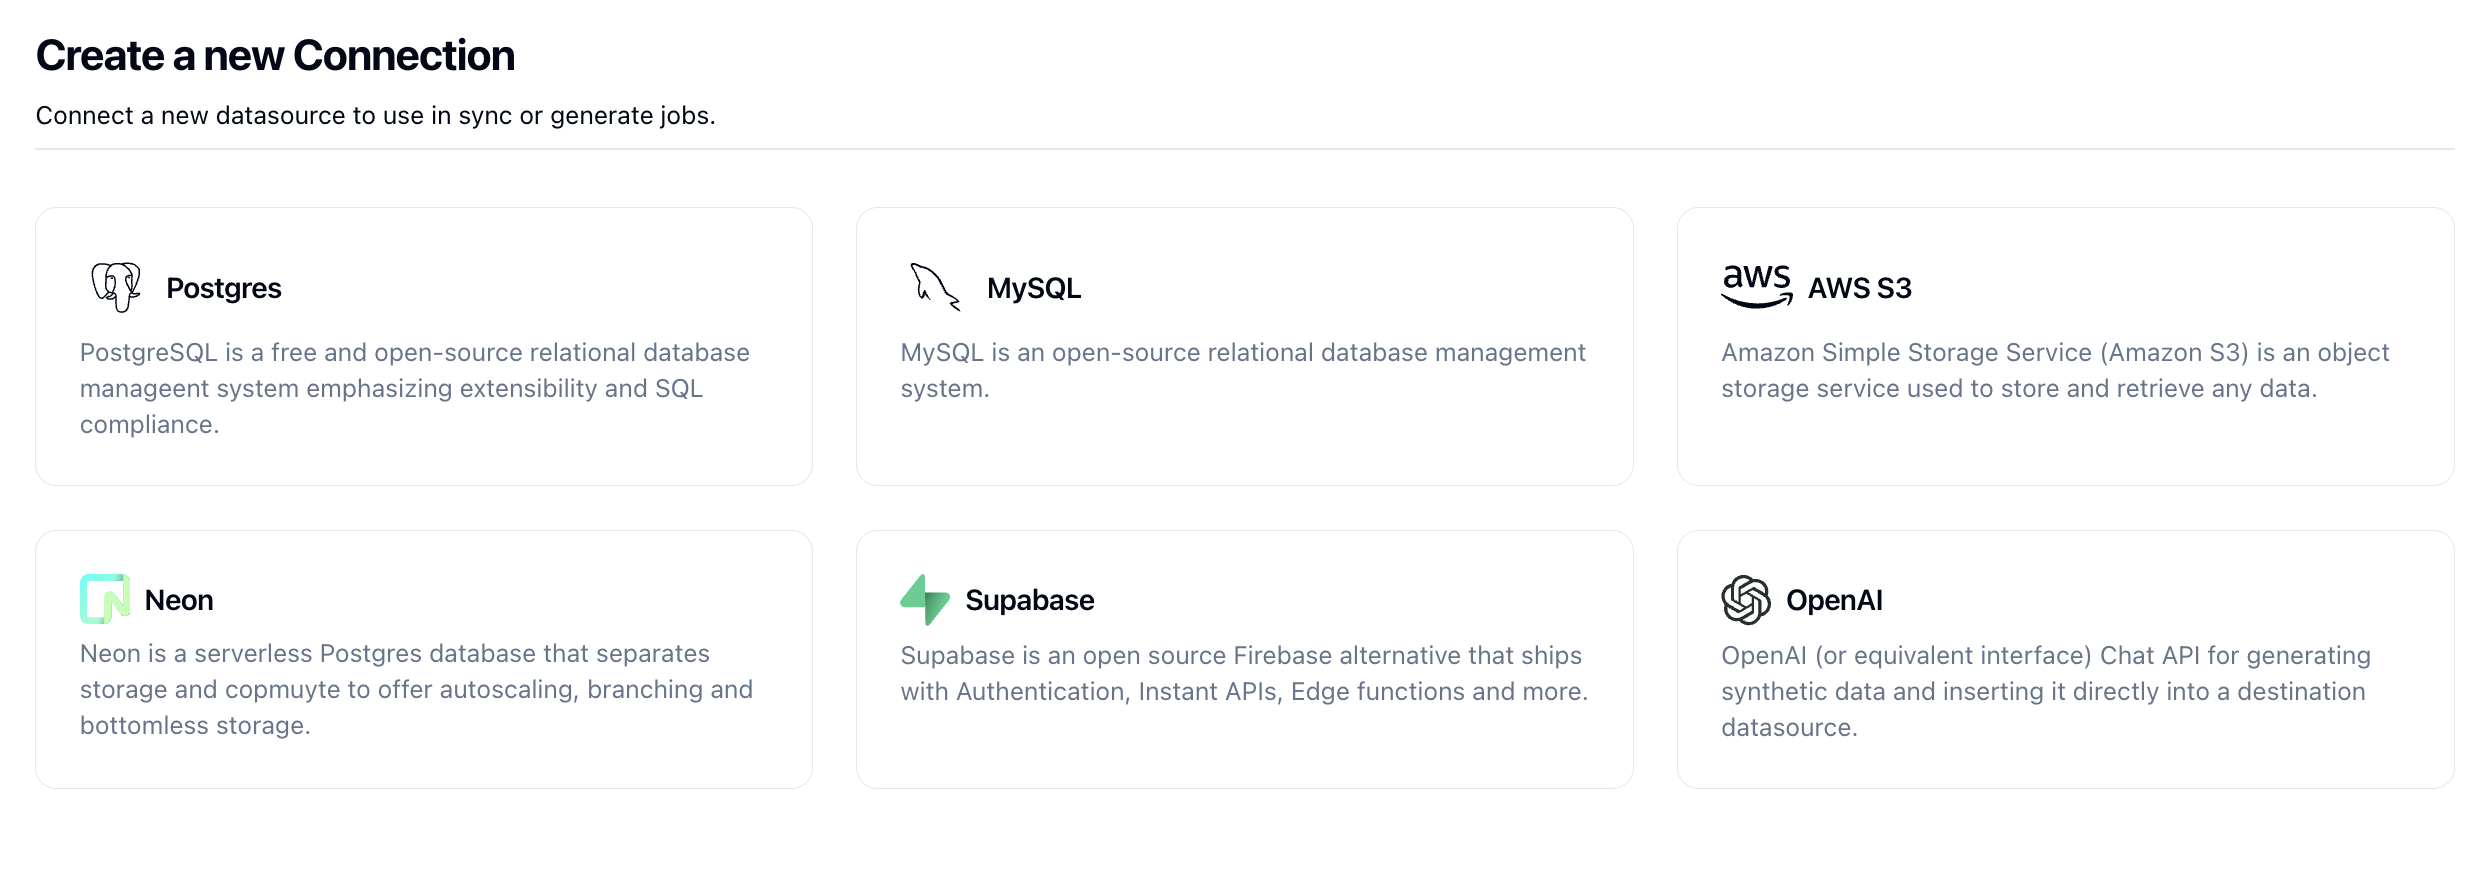
Then select a Postgres compatible database such as Neon, Supabase or just the base Postgres connection.
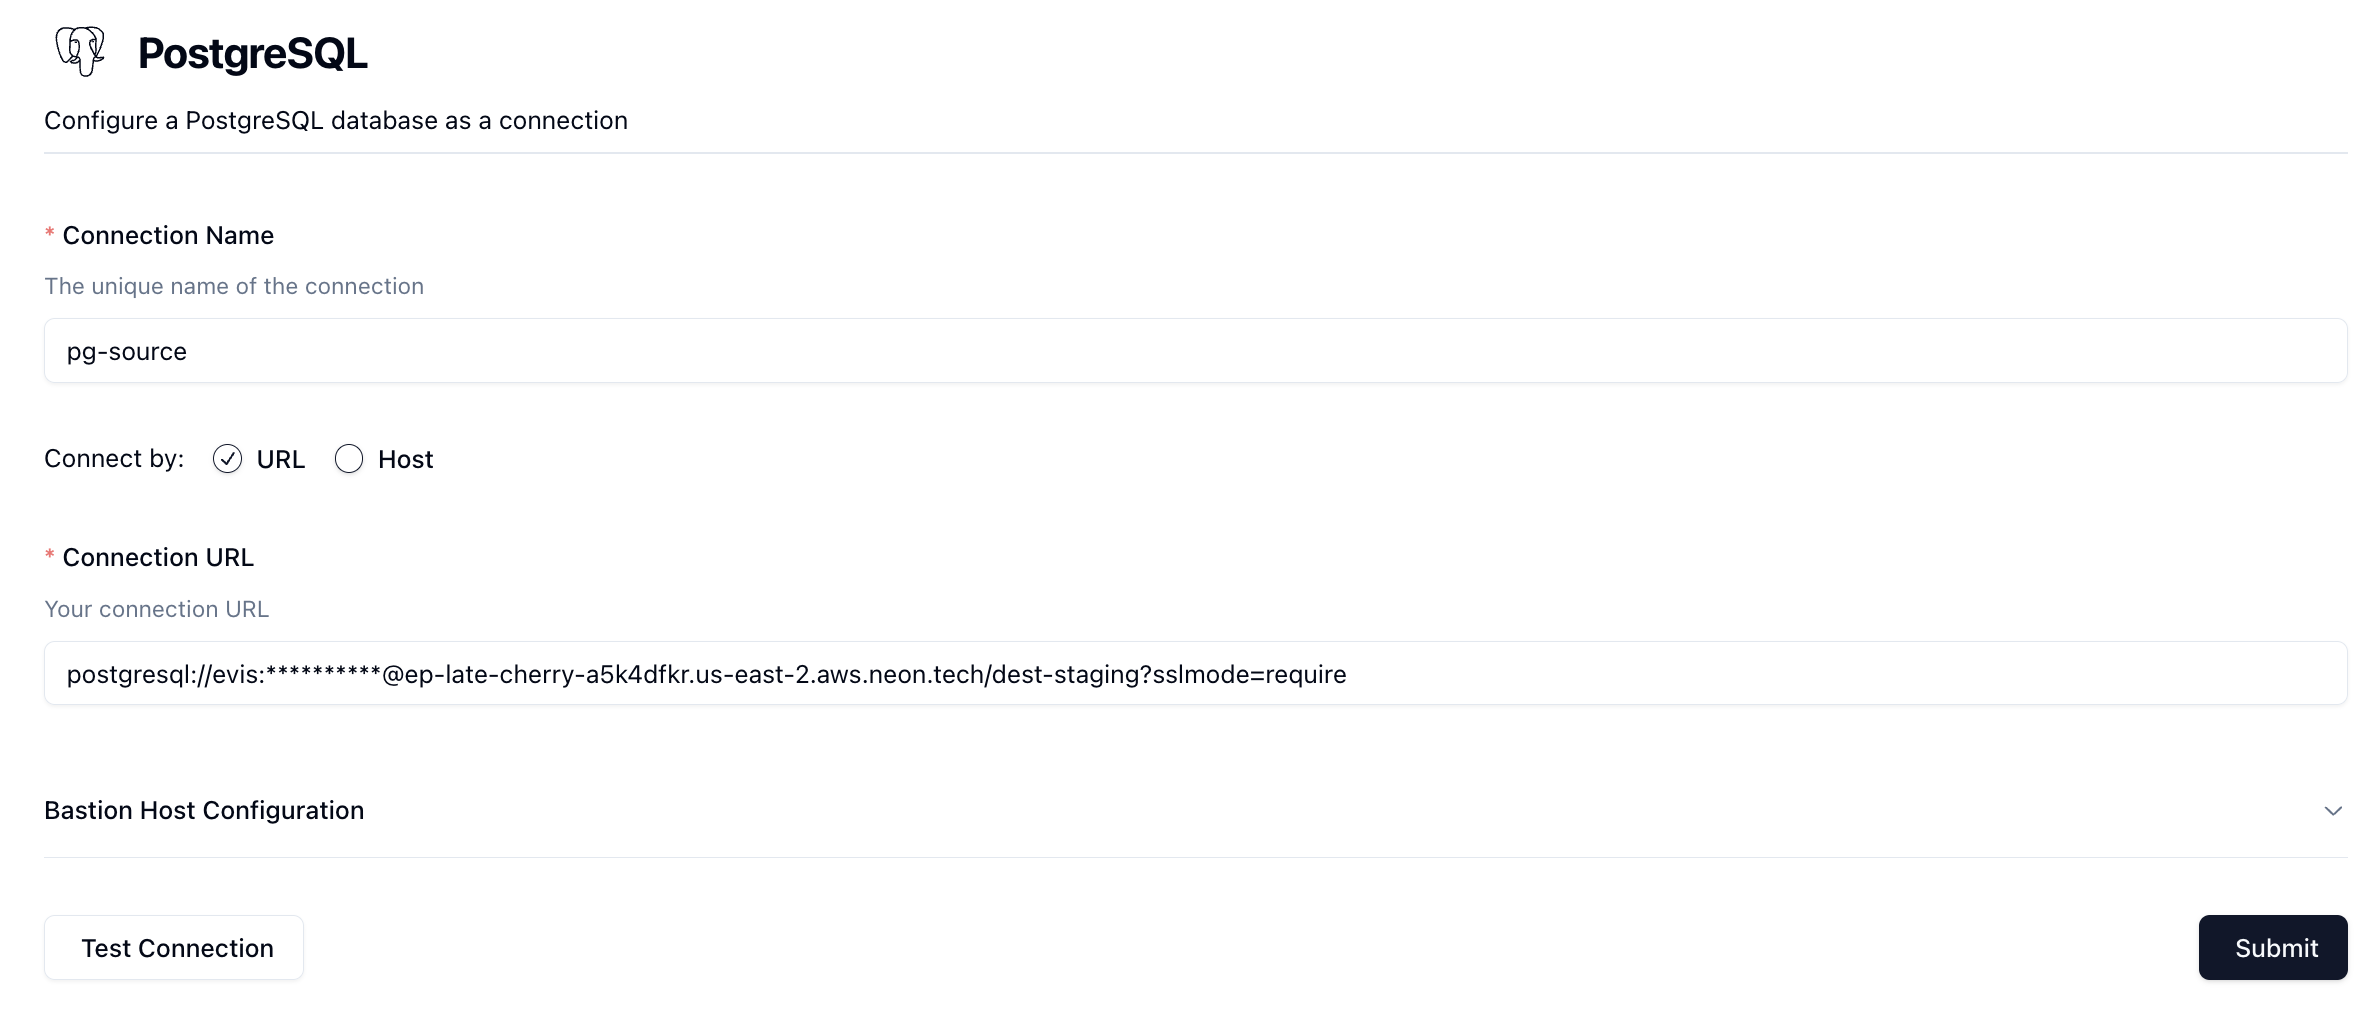
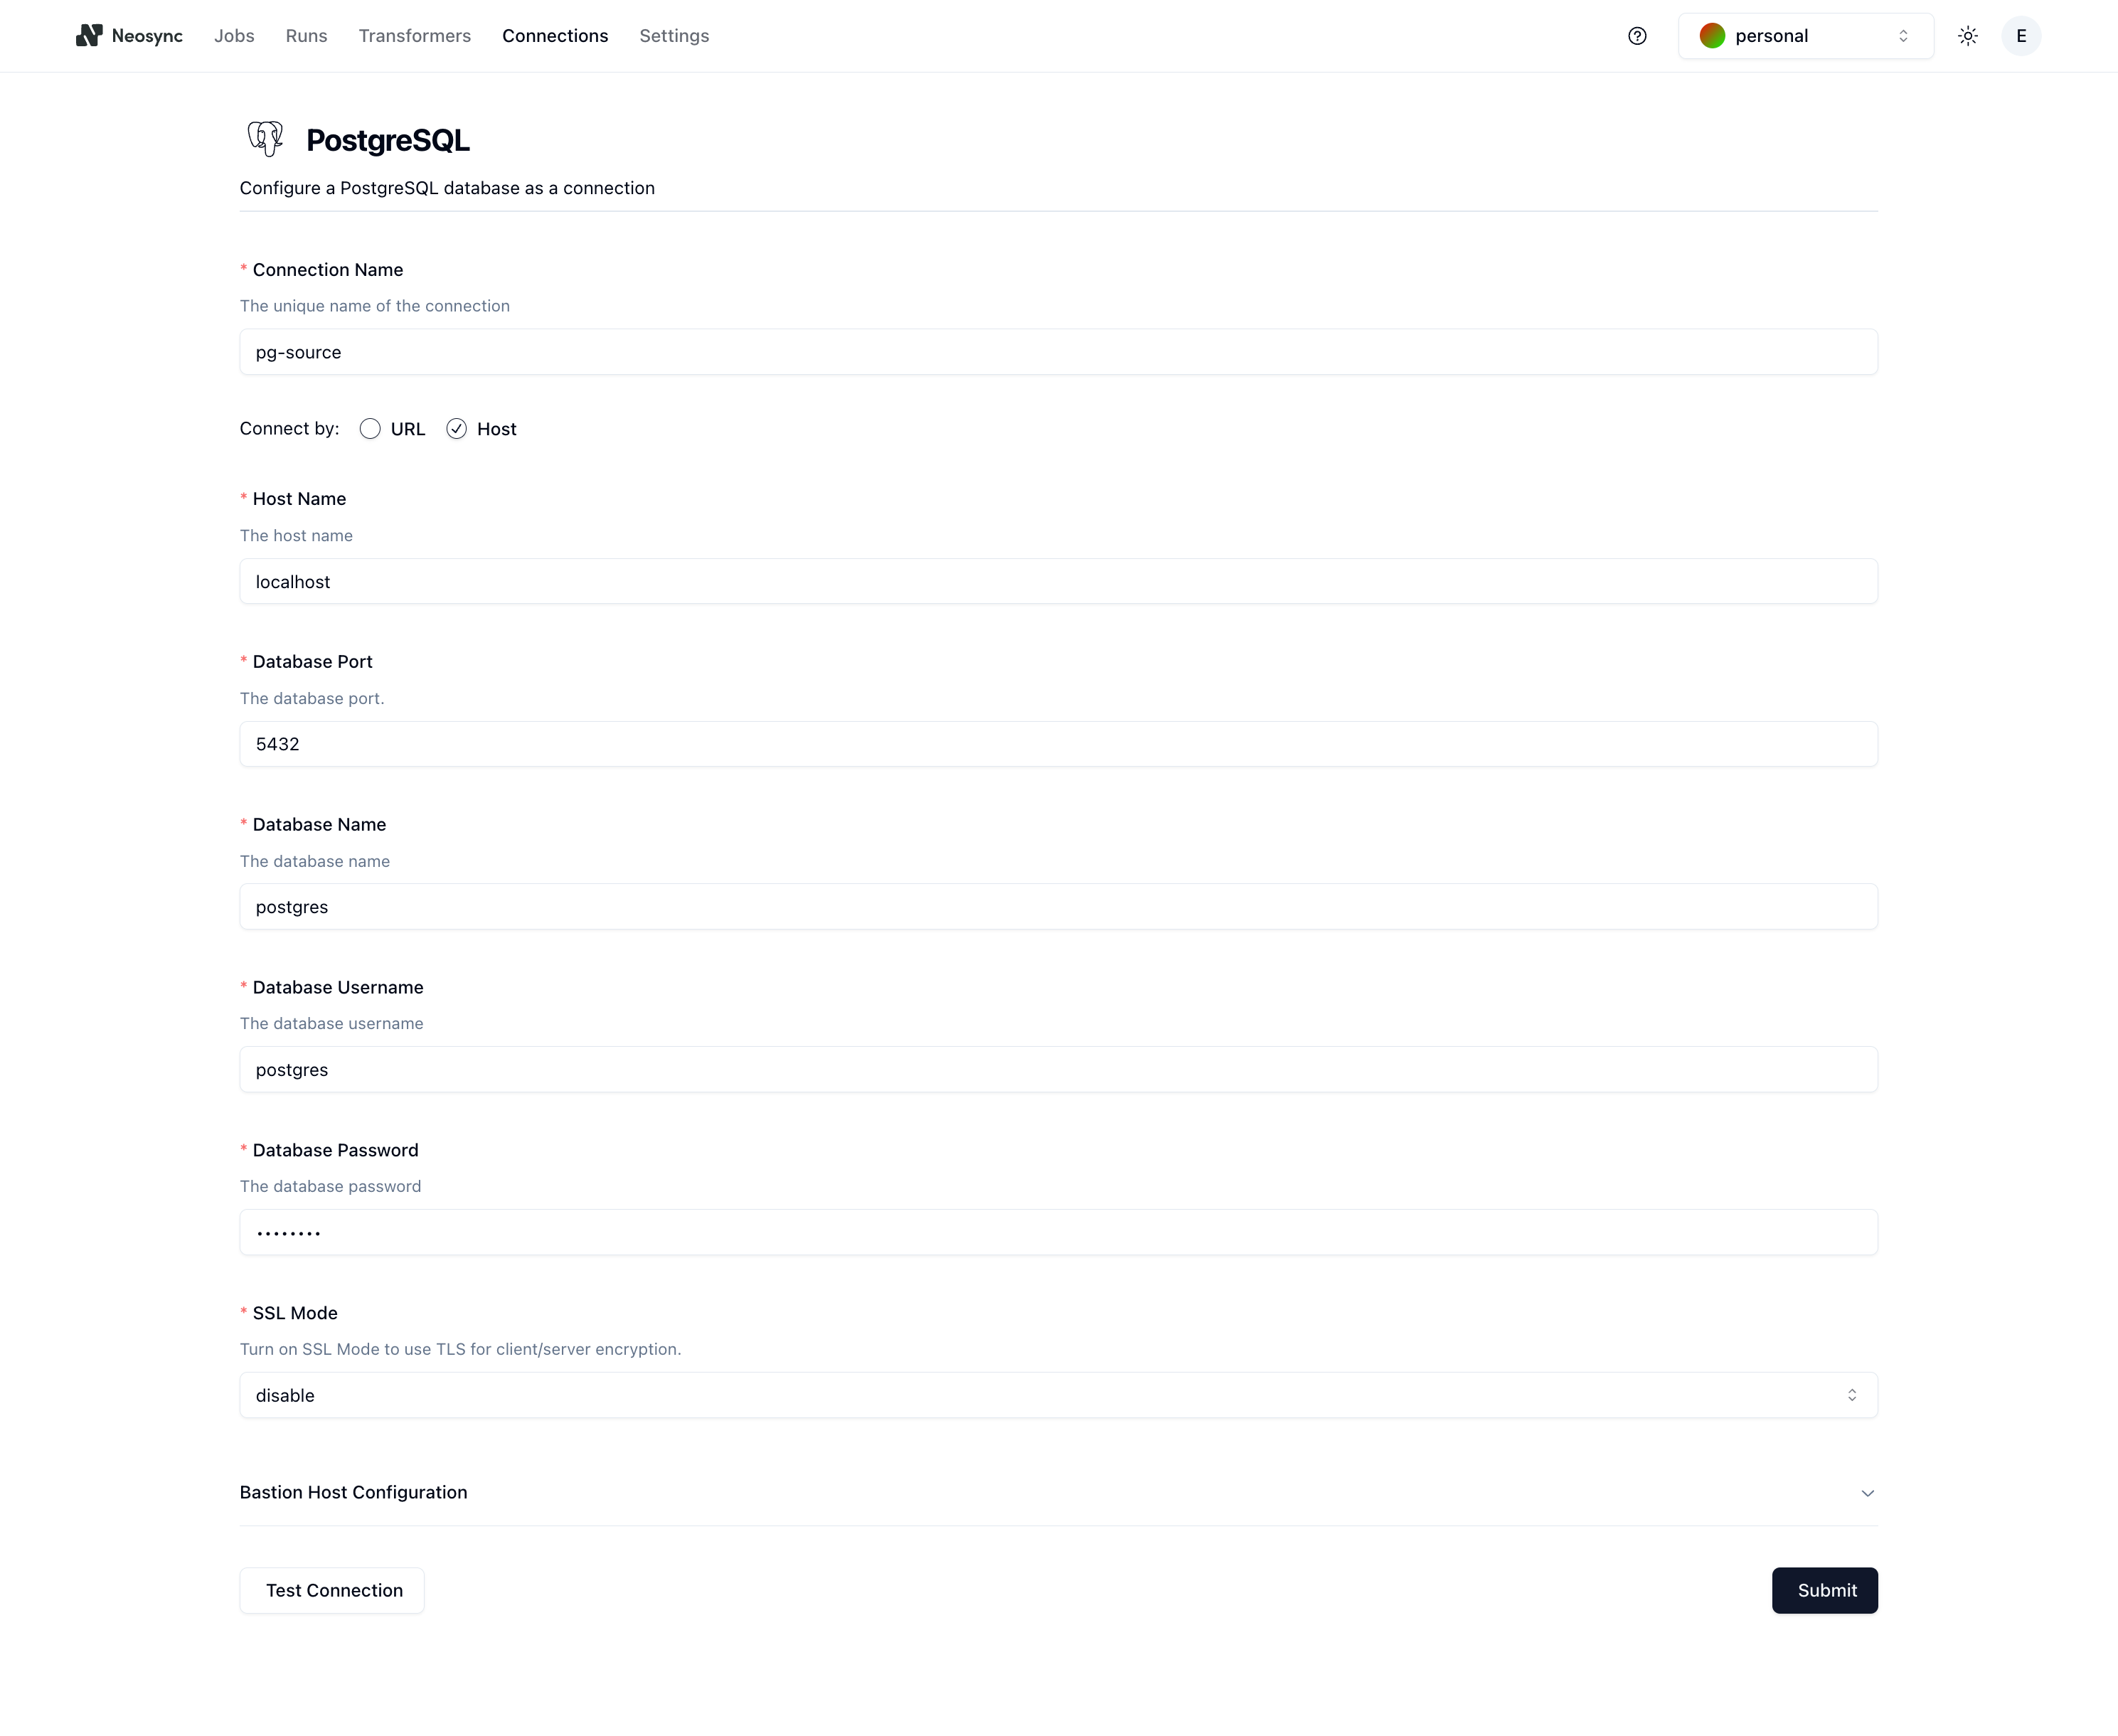
You'll now be taken to the Postgres connection form.
First, name your connection in the Connection Name field.
Next, decide how you want to connect to your Postgres database. You can configure your connection by providing a connection URL or by entering in the different connection parameters.
To connect using the connection URL, simply paste the connection url in the Connection URL input.
To connect using the host and connection parameters, click on the Host radio button. You'll see a form appear with the different components of the connection string broken out into individual input fields.
| Field | Description |
|---|---|
| Host Name | The address of the server where your PostgreSQL database is hosted. Use 'localhost' for a local database or enter the IP address or domain name for a remote server. |
| Database Port | PostgreSQL's default port is 5432. If your database listens on a different port, specify it here. |
| Database Name | Enter the name of the database you wish to connect to. The database should already exist on the PostgreSQL server. |
| Database Username | The username with which you will log in to the database. Ensure it has the necessary permissions for reading or writing data. |
| Database Password | Enter the password associated with the username. Make sure this information is correct for data security. |
| SSL Mode | Choose an SSL mode based on your company's security policies. 'Require' enforces SSL connections for enhanced security. |
Complete the fields in order to connect to your Postgres Database.
TLS
Neosync has support for Regular TLS (one-way) as well as mTLS (two-way).
This is configured via the Client TLS Certificates section on the database configuration page.
If you simply wish to verify the server certificate, only the Root certificate is required.
If wishing to have the client present a certificate, you must specify both the Client key as well as the Client certificate.
If only one of these is provided, the Neosync will reject the configuration.
The following TLS/SSL modes are available for Postgres via the sslMode query parameter.
NB: if using the
URLconfiguration, you will need to specify this directly in the query parameters. If using the host configuration, be sure to select the correct option in the dropdown that you intend to use.
disable    - No SSL at all, plain TCP
allow      - First try non-SSL, if that fails, try SSL
prefer     - First try SSL, if that fails, try non-SSL (default)
require    - Always use SSL, but don't verify certificates
verify-ca  - Always use SSL and verify server has valid certificate
verify-full- Always use SSL, verify certificate and check server hostname
The server name must be provided if using verify-full otherwise the client will not have enough information to fully verify the host and will fail connection.
Go Postgres Driver
Neosync uses the jackc/pgx driver for Postgres support. You can find information about this by visiting their Readme.
Neosync expects Postgres urls to be in the standard URI format. If using the Host view, this is converted to a URI when use at runtime.
Permissions
This section details the Postgres role permissions necessary for Neosync to function properly.
This will vary based on the connection, and this section details the minimum permissions required for a source and/or destination connection. You'll be able to validate your role checks by testing your connection, which can be seen in the below section.
Source Connections
A source connection is used for sync jobs where you want to synchronize data from one connection to another.
The source connection will be used in a readonly manner, and as such, only requires the SELECT permission set on the table or tables that will be synced.
This can be done with the GRANT capability in SQL.
Example:
GRANT SELECT ON public.users TO myrole;
Note: Depending on your database configuration, if Neosync is returning permission denied or unable to access any tables, you may need to grant usage on the schema in question. This can be done for your schema, similar to the example below:
GRANT USAGE on SCHEMA public TO myrole;
GRANT USAGE ON SEQUENCE my_sequence TO myrole; -- or GRANT USAGE ON ALL SEQUENCE TO myrole;
Destination Connections
A destination connection is used for sync and generate jobs, where data will be inserted into the configured connection. This requires slightly more permissions, but you can get away with more or less depending on what you are looking to do.
At a bare minimum, this connection requires CREATE, UPDATE on all tables that will be written to.
You will also need to grant permissions to any sequences, triggers, or functions that may be invoked during the insertion or update process.
NB: If any sequences exist in your database, Neosync will need to be invoked as the owner of those Sequences. Neosync resets sequences after truncation and during the post-table sync in order for them to be in a good state for future insertions. Postgres has a limitation that only the Sequence owner may do this. This is not an issue if using Neosync to create your schemas, but will arise if those sequences were created via a role other than the one being used by Neosync.
Example:
GRANT CREATE, UPDATE on public.users TO myrole;

GRANT USAGE ON FUNCTION <name> TO myrole; -- optional if you have functions
GRANT USAGE ON SEQUENCE <name> TO myrole; -- optional if you have sequences
If you are planning to allow Neosync to truncate data prior to a job run, then the TRUNCATE permissions will need to be added.
GRANT TRUNCATE on public.users TO myrole;
If you are planning to allow Neosync to initialize tables within a schema, you will need to grant more permissions in order to do so.
GRANT CREATE ON SCHEMA public TO myrole;
Testing your Connection
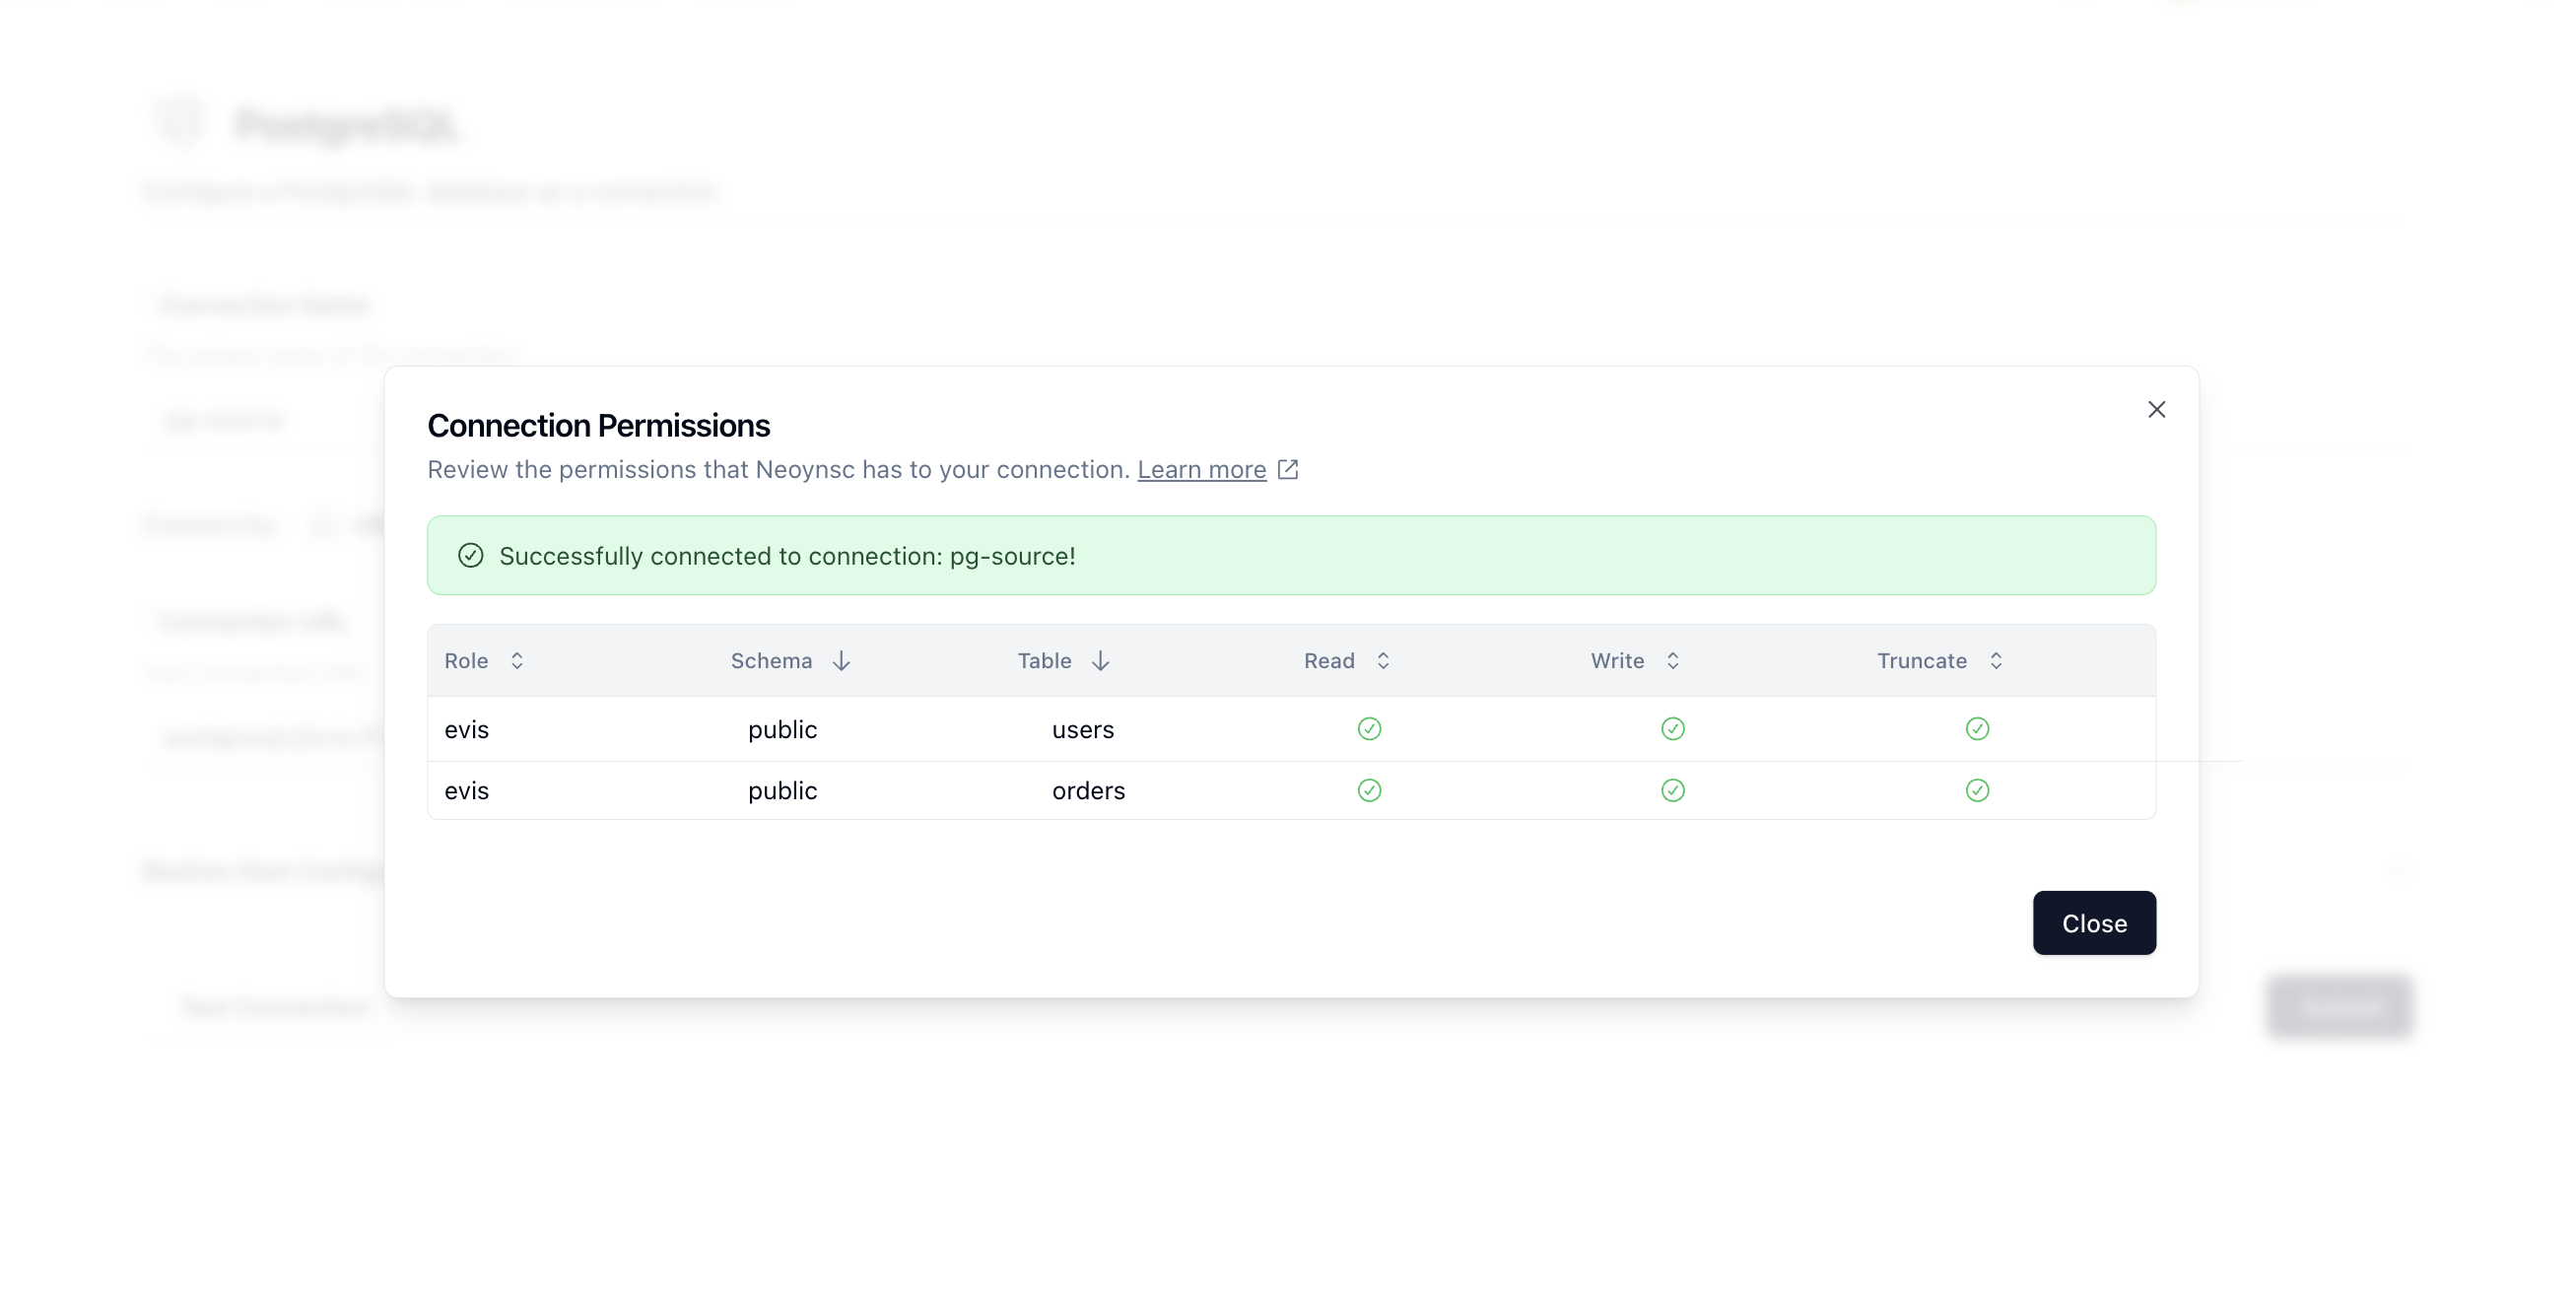
Once you've configured your connection either using the connection parameters or using the connection url, click on Test Connection in order to test the connectivity to your connection.
When you click Test Connection, the following tasks are done:
- Neosync attempts to simply connect and ping the database to ensure a valid connection
- Neosync queries the
information_schemato return a view of what the configured role is able to access.
You should validate that Neosync can see all of the schemas and tables that you'd like to work with. Otherwise, you may have to update your permissions or use a different role.
Based on the connection type (source or destination) - you may see varying values here. Consult the permissions section above for more information on what you should expect to see based on how the role has been configured.
Please note that this is not fully encompassing and only checks permissions directly on tables themselves. This does not currently include functions, sequences, etc.
If you are running in to issues with permissions, please consult us on Discord.
A successful connection will return something like this:
